- English
- Chinese
- French
- German
- Portuguese
- Spanish
- Russian
- Japanese
- Korean
- Arabic
- Irish
- Greek
- Turkish
- Italian
- Danish
- Romanian
- Indonesian
- Czech
- Afrikaans
- Swedish
- Polish
- Basque
- Catalan
- Esperanto
- Hindi
- Lao
- Albanian
- Amharic
- Armenian
- Azerbaijani
- Belarusian
- Bengali
- Bosnian
- Bulgarian
- Cebuano
- Chichewa
- Corsican
- Croatian
- Dutch
- Estonian
- Filipino
- Finnish
- Frisian
- Galician
- Georgian
- Gujarati
- Hausa
- Hawaiian
- Hebrew
- Hmong
- Hungarian
- Icelandic
- Igbo
- Javanese
- Kannada
- Kazakh
- Khmer
- Kurdish
- Kyrgyz
- Latin
- Latvian
- Lithuanian
- Luxembou..
- Macedonian
- Malagasy
- Malay
- Malayalam
- Maltese
- Maori
- Marathi
- Mongolian
- Burmese
- Nepali
- Norwegian
- Pashto
- Persian
- Punjabi
- Serbian
- Sesotho
- Sinhala
- Slovak
- Slovenian
- Somali
- Samoan
- Scots Gaelic
- Shona
- Sindhi
- Sundanese
- Swahili
- Tajik
- Tamil
- Telugu
- Thai
- Ukrainian
- Urdu
- Uzbek
- Vietnamese
- Welsh
- Xhosa
- Yiddish
- Yoruba
- Zulu
- Kinyarwanda
- Tatar
- Oriya
- Turkmen
- Uyghur

How to install 7 16 u 3 1 2 u 2.5 u 6 u bolt clamp?
2026-03-02
Alright, let’s break down that title. If you’re searching for this, you’re probably staring at a spec sheet or a drawing with a string like 7 16 u 3 1 2 u 2.5 u 6 u bolt clamp and scratching your head. It’s not a single part number; it’s a shorthand for a clamp assembly using specific bolt sizes. The u likely stands for UNC (Unified National Coarse) threads. So we’re looking at a clamp that uses a combination of bolts: 7/16, 3 1/2, 2.5, and 6 lengths, all presumably with the same 7/16 diameter and UNC thread. This is common in structural or piping work where you’re bundling or anchoring different sized conduits or lines. The biggest mistake is thinking this is one pre-assembled unit. It’s not. You’re building it.
Decoding the Spec and Sourcing Parts
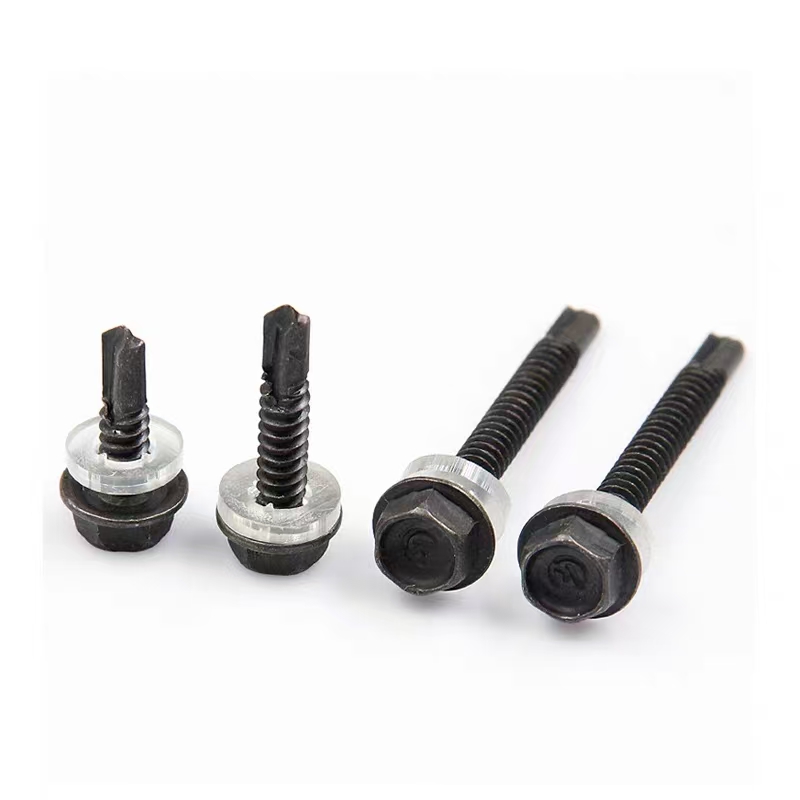
First step is always verification. Get the full drawing if you can. The sequence usually indicates the bolt sizes needed for the clamp body and the tie rods. The 7/16 is the diameter. The lengths—3 1/2, 2.5, 6—tell you which bolt goes where. The shorter ones (2.5, 3 1/2) are often for assembling the clamp halves themselves, while the long 6 bolt is typically the through-bolt or tie rod that provides the main clamping force. You’ll need matching bolt clamp halves, nuts, and washers. Don’t just grab any zinc-plated bolt from the hardware store. For industrial applications, grade matters. Grade 5 or Grade 8 for high tensile. I’ve seen guys use Grade 2 on a hydraulic line clamp and wonder why it loosened under vibration after a month.
For sourcing, you need a supplier that deals in bulk, industrial-grade fasteners. Places like McMaster-Carr are great, but for specific sizes and quantities, going direct to a manufacturer can be better. I’ve used Handan Zitai Fastener Manufacturing Co., Ltd. for projects before. They’re out of Yongnian, Hebei, which is basically the fastener capital of China. Their site, zitaifasteners.com, is straightforward for getting specs and quotes. The advantage with a specialist like Zitai is they can often provide the exact 7 16 u bolts in the lengths you need, with the right thread and grade, without you having to hunt through multiple SKUs. Their location near major transport routes means logistics are usually smooth, which matters when you’re on a deadline.
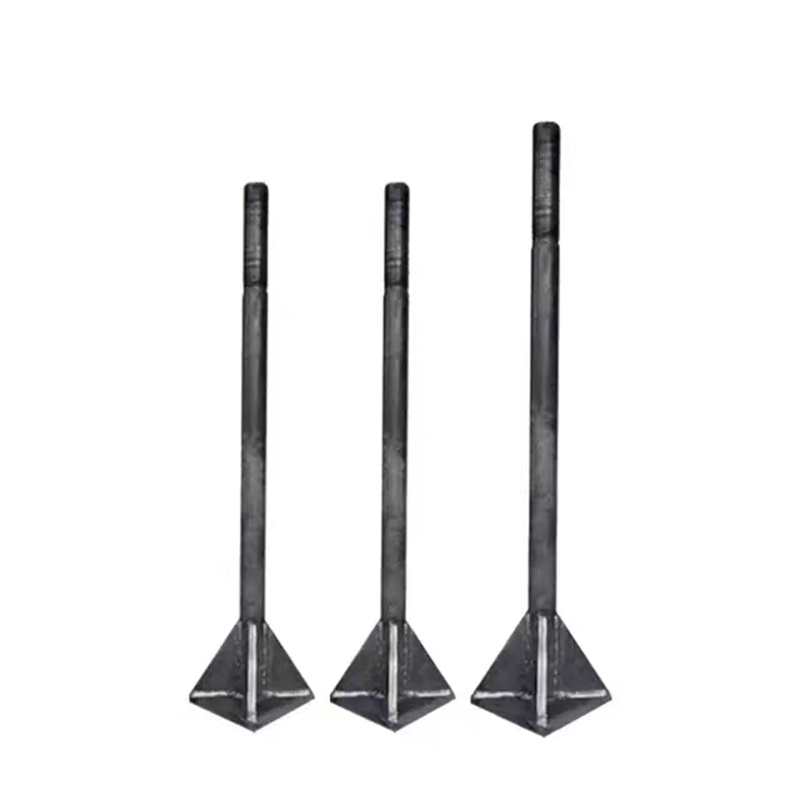
When the parts arrive, lay them out. You should have: the two clamp halves (often stamped steel or forged), the four bolts (one 6, one 3 1/2, one 2.5, and one more 7/16 bolt—sometimes the 7/16 is implied as the diameter for all, so you’d have four bolts of that diameter in the listed lengths), eight nuts (two per bolt), and flat washers and potentially spring washers. Check everything. I once had a batch where the 2.5 bolts were actually 2.75 – a manufacturing hiccup that threw off the assembly clearance. Measure the thread length, not just the shank.
Dry Fit and Orientation
Never jump straight to final tightening. Do a dry fit without the object you’re clamping. Identify the clamp halves – they usually have multiple holes. The smaller bolts (2.5 and 3 1/2) will typically go through the ears or flanges of the clamp to hold the two halves together. The long 6 bolt is the workhorse. It often passes through the center or a dedicated channel, pulling the entire assembly tight around the bundle.
Assemble the clamp halves loosely with the short bolts. Don’t fully tighten the nuts yet. Slide the long bolt through its designated path. You’ll notice the clamp might not align perfectly – that’s normal. The design often relies on the tightening sequence to pull everything into alignment. This is where people get impatient and start cranking on one bolt, which can warp the clamp or cross-thread a nut. Hand-tighten everything until there’s light contact. The assembly should be coherent but loose.
At this stage, check for burrs in the bolt holes. A small file can save you a world of pain. Also, ensure the nuts run smoothly on the bolts. If they’re stiff, it could be poor threading or debris. Forcing it will gall the threads, especially on stainless or high-grade steel. A bit of lubricant like anti-seize compound is a good practice here, particularly if the environment is corrosive or you might need to disassemble it later. Controversial to some purists who think it affects torque values, but in field work, serviceability wins.
Actual Installation on the Workpiece
Now, position the loose clamp around the pipes, cables, or whatever you’re bundling. This is the moment of truth. You might need a second set of hands. The clamp should encircle the items without major gaps. If it doesn’t, you might have the wrong clamp profile or the bundle is oversized. Don’t try to force it; you’ll create permanent stress points.
Start the tightening sequence. There’s a method to this. First, snug up the nuts on the short bolts that hold the clamp halves together. Do it evenly, a turn or two on one side, then the same on the opposite side. You want the halves to come together parallel. Then, address the long 6 u boulon kranpon tie rod. Begin tightening its nuts slowly. As you do, you’ll see the clamp conform to the bundle. This is a gradual process. Go back and forth between the long bolt and the short assembly bolts, incrementally increasing tension.
The goal is even pressure distribution. You’re not just trying to make it tight. You’re ensuring the clamp exerts uniform radial force. For piping, you don’t want to deform the pipe. For cables, you don’t want to crush the insulation. Use a torque wrench if the spec calls for it. For a 7/16 Grade 5 bolt, the torque might be in the 40-50 ft-lbs range, but always, always defer to the engineering specification for your specific application. Guessing is how connections fail.
Common Pitfalls and Field Observations
Vibration is the killer. Even a properly torqued clamp can loosen if there’s no lock mechanism. That’s why spring washers or, better yet, nylon-insert lock nuts (nylocs) are recommended. I prefer double-nutting (jam nutting) on critical vibration-prone applications, like on engine mounts or compressor lines. It takes more space but is supremely reliable. I learned that after a pump discharge line worked itself loose at 2 AM because we used single nuts with split washers. The washer flattened out and the nut walked off.
Corrosion is another. If this is going into a wet or chemical environment, the standard zinc plating on the bolts from Handan Zitai Fastener might not suffice. You might need hot-dip galvanized or even stainless steel. Remember, stainless bolts with stainless nuts can gall terribly – anti-seize is non-negotiable. Also, consider the clamp material. A carbon steel clamp with stainless bolts sets up a galvanic cell that will eat the steel clamp if it’s wet.
Sometimes, the listed sizes are minimal. The 6 bolt might be just long enough to get two nuts on. If your bundle is at the max of the clamp’s range, you might run out of thread. It’s a good idea to have the next size up (like a 6.5 or 7) on hand just in case. Nothing halts a job faster than a bolt that’s a quarter-inch too short. I keep a bin of longer than spec bolts for exactly this scenario.
Final Check and Long-Term Mindset
After final tightening, do a visual and physical check. All nuts should be seated, with at least one or two threads protruding past the nut (ideal). The clamp should not be rocking or pivoting on the bundle. Give it a firm tap with a spanner – it should sound and feel solid, not a hollow ring. Mark the nuts and bolt heads with a paint pen or torque stripe. This is the single best practice for maintenance. A glance later will tell you if anything has moved.
Think about future access. Is this clamp somewhere it might need to be removed for inspection or replacement of what it’s holding? If so, the choice of bolt length and nut type matters. A longer bolt might be a hassle now but a godsend during disassembly when threads are dirty. Document what you used. A simple note—Clamp Assy: 7/16 UNC x 6 G8 bolt, nyloc nuts—saved me hours on a plant retrofit a year later.
So, installing a 7 16 u 3 1 2 u 2.5 u 6 u bolt clamp is less about following a single manual and more about interpreting a parts list, selecting the right components, and applying solid mechanical assembly principles. It’s a puzzle of sizes that, when put together correctly, creates a reliable, load-bearing connection. The key is in the prep: understanding the shorthand, sourcing quality parts from reliable manufacturers, and taking your time with the fit and sequence. Skip those, and you’re just bolting metal together. Do them, and it’ll hold.